Best free Lightroom presets 2022: top presets for portraits, weddings and more
The best free Lightroom presets for speedy edits
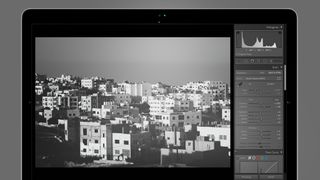
Looking for some photo-editing inspiration? Using the best free Lightroom presets is a fine way to test-drive some new styles and looks without shelling out for paid presets. And our guide is here to cherry-pick the best ones for you take for a spin.
Whether you’re an amateur or a pro, editing photos is a necessary evil. Getting a photo from rough-and-ready to print-perfect takes time, expertise and experience, especially when it comes to aping a particular style or working to get all your images stylistically consistent.
Thank goodness, then, for Lightroom and its marvelous system of presets. The theory is simple: a Lightroom preset is simply a bundled-up set of edits, taken from the program's Develop module. These can be a single edit, such as a levels adjustment, or they can be more holistic – a curves change, a white balance tweak, levels, or a color-grading fix. Presets can do anything from subtly adjust images to making swinging changes.
Making a preset in Lightroom is pretty easy: make the changes you want to a sample image, then in Lightroom Classic, go to Develop > New Preset, or press Shift-CMD-N. Choose which elements of your edit you want to include, pick a snappy name and hit OK. In Lightroom – not the full-fat Classic version – press Shift-P to open the presets panel, click the three little dots at the top of the new panel, and choose Create Preset.
All well and good, but it’s a creative world out there, and there are Lightroom magicians all over the place making presets that will be useful whatever genre of photography you’re in. Portrait, black and white, you name it – there’s probably a free Lightroom preset for it, and it’s possibly free. Here, we’ll reveal some of our favorites, as well as explain how to install them.
- These are the world's best photo editing apps
How to install a Lightroom preset
In Lightroom Classic
Installing presets in Lightroom Classic is easier than falling off a log. Follow the link provided – most preset houses will want an email address in exchange for a free preset – and download what will normally be a ZIP file containing an XMP file and an .lrtemplate file.
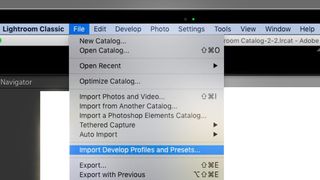
Unzip the files and open Lightroom Classic. If you have an XMP file, you can click File > Import Develop Profiles and Presets; just navigate to the folder your new preset lives and double-click it. If you have an .lrtemplate file, life is even easier – just drag the .lrtemplate file onto your Lightroom Classic window and a prompt will appear asking if you want to install it. Click 'Install', obviously.
Using your preset is easy, too. Choose any image, then in the right-hand panel, under Quick Develop, choose the drop-down list next to Saved Preset. Your new preset will be in there. Quick tip for those looking for visual consistency: when you’re in grid view you can choose multiple images at once and apply the same preset to them all with a single click.
In Lightroom
Despite its positioning as Lightroom Classic’s more consumer-friendly partner, Lightroom actually makes installing a preset slightly more complicated, as the drag-and-drop trick above doesn’t work. Instead, go to File > Import Profiles and Presets, then navigate to the folder you’ve downloaded your preset to. Just like Lightroom Classic, both XMP and .lrtemplate files will work interchangeably, so it doesn’t matter which format your preset has been delivered in.
Once it’s installed, using a preset on a single image is pretty straightforward – double-click your image, choose the Edit icon (the one with the sliders on it) at the top of the right-hand toolbar, then click the small 'Presets' button, where you’ll find your new preset. Using your preset on lots of images at once is inexplicably a bit harder than it is with Lightroom Classic – choose an image and apply your preset to it, then press CMD-C to copy its settings. Then, in grid view, press CMD-V to paste your settings to a selection of images.
- Photoshop vs Lightroom: what's the difference and which is the best for you?
The best free Lightroom presets 2021
Choosing the best free Lightroom preset for you depends very much on the kind of photo (or photos) you're looking to edit. So we've split our top picks into photo styles, starting with the best presets for portraits...
The best free Lightroom presets for portraits
Warm Cinematic (Preset Love)
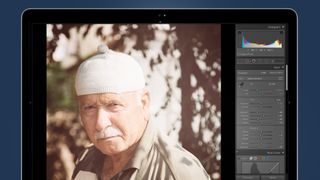
Lightroom presets often come in two flavors: blink-and-you’ll-miss-it subtle and in-yer-face. Warm Cinematic heads in the latter direction, draining your image of contrast and going heavy on the reds.
The result is a gorgeous, stylized effect which works really well on images with particularly shallow depth of field. We found it worked equally effectively on light and dark skin tones. The effect on images can be a little aged – like an old roll of film – so don’t be afraid, like us, to add a little grain to finish the effect.
Portrait B&W (FixThePhoto)
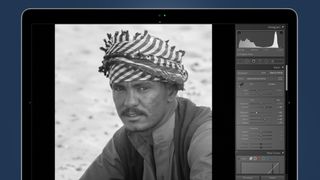
This one is deliciously simple, and does what any really good preset should do – provide a starting point for an edit rather than promising a finished image in a single click.
To that end, it pulls up the overall exposure of your image a touch, converts it to monochrome and gives the contrast a healthy – but not extreme – shove. Otherwise it leaves your image alone, leaving you to figure out exactly what you want to do with the tone curve and fine detail settings such as clarity, texture and sharpening.
Portrait1 (Photonify)
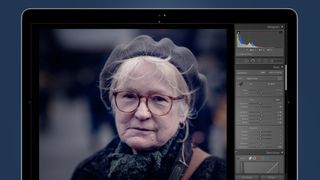
Subtle it ain’t, but if moody, crunchy images are your thing, 'Portrait1' is where it’s at in terms of adding instant mood to a shot. There are some dramatic alterations made to the color grading tools, resulting in a strong shift towards blues and purples.
Despite this, both light and dark skin tones were graded relatively sympathetically, albeit within the preset’s rather dystopian aesthetic. We don’t like the huge pull on the sharpening slider, which introduced lots of crunchy-looking artifacts, so you’d be advised to pull that back to a more believable level and give the Grain slider a tweak instead.
The best free Lightroom presets for weddings
Narrow Streets (PhotoTraces)
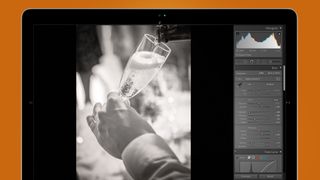
Don’t be put off by the name – street photography-style wedding photography is all the rage these days, and this monochromatic (but not black and white) sepia-tinged preset is a really nice way of underscoring the fact that, while you might be shooting your sister-in-laws’ second nuptials, you’re really Don McCullin at heart.
There’s a subtle vignette included with this preset, which might be worth watching out for, or at least varying, if you’re planning to give the Narrow Streets treatment to a big group of photos, as it can begin to look pretty repetitive.
Free Style (Parker Photographic)
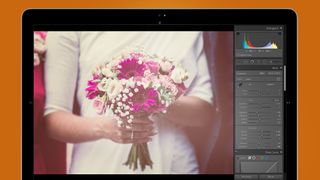
We’re not going to lie, this ultra-stylized, faded, filmic preset isn’t going to suit all weddings – show it to a wedding planner who’s just put together an ultra-chic, ultra-modern mood-board and they’ll be able to hear the screams from Jupiter.
But, if your bride and groom are young, stylish, avant-garde and fancy a few Instagram Likes to go along with their big day, this contrast-light, slightly grainy, de-saturated preset can look really great.
The best free Lightroom presets for landscapes
Mountains & Valleys 09 (Kevin Krautgartner)
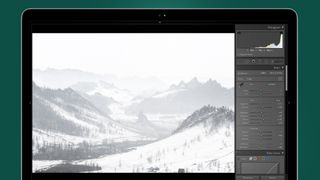
This preset is actually one of 10 free presets from Kevin Krautner, and the collection is an aesthetically coherent, taut set of interesting looking options for landscape images.
They’re definitely a cut above the standard landscape preset – you know the type, warm up the white balance a bit, add some sharpness, over-saturate everything. Instead, these slightly understated, dark, shadow-crushing options give an element of added interest to everything they touch. You’ll need to start off with a great photo first, mind.
Light & Desaturated (Shutter Pulse)
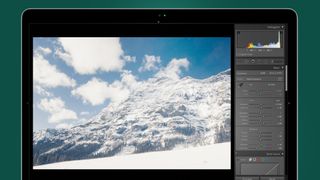
Do you like cold places? Us too, but getting a striking look for them can be tough. This preset – part of a useful free bundle from Shutter Pulse – is another dark, moody look that leaves plenty of blue in an image, making it great for underscoring just how numb your toes were while you were shooting.
Most of the color work is done in the grading panel, leaving you to keep white balance and therefore overall color looking accurate. Pleasingly, there’s no added vignette, allowing you to keep your exposure correct in the corners.
Very Dynamic (Free Presets)
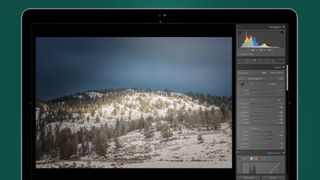
Subtlety is the name of the game here – although you wouldn’t know it from how the tone sliders get muscled around. Highlights and whites are reduced nearly all the way, with the inverse true for shadows and blacks.
Similarly, contrast is given an almighty shove, and the color grading wheels are similarly abused. It feels like it shouldn’t work but… it does. Images with strong light work particularly well with this one.
The best free Lightroom presets for black and white
Fujifilm Neopan (Preset Love)
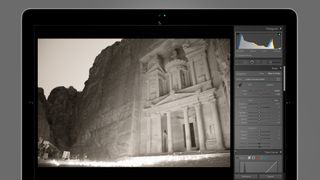
Black-and-white photography is astonishingly hard to get right, and so of all the genres of Lightroom preset out there, monochromatic presets are perhaps the most useful. This one, named after Fujifilm’s classic 35mm, 120 and 135 black and white films, is a particular peach.
It's sepia, roughly speaking, but not in the tea-stained, my-first-olde-worlde way. Exposure is left basically unchanged, so unlike a lot of black and white presets, the blacks in an image don’t get crushed, while highlights are left similarly unscathed. Instead, all the legwork is done in the color-grading and grain panels, with pleasing results.
Greenland (Northlandscapes)

This pay-what-you-think-is-fair set of presets has a couple of great options for black and white photography, but our favorite is this contrast-less, bright offering which works fantastically on high-contrast images. Shadows and blacks are crushed, resulting in mushy grey lowlights but peachy bright highlights. If you’re going to print from this preset we’d recommend soft-proofing first as it’s possible those washed-out blacks might look less than impressive on certain fine art papers.
Free Beast (Parker Photographic)
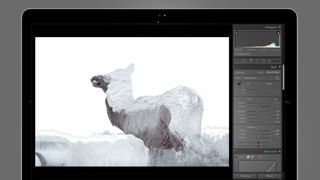
This lovely, blue-silver effect can turn the right photo into a masterpiece. Look closely at the colour grading panel and you’ll see a splash of red in there as well; the result is a subtle, well-played preset where nearly all the action happens in the midtones. The tone sliders are left nearly totally alone, meaning this is a preset that works particularly well on images with humpy histograms – that is, no huge areas of over- or under-exposure. The presence sliders get a pretty good shove, with texture and clarity receiving a good muscling, while the sharpening slider is similarly abused. That makes for images that look fantastic at low-resolution for the web, but as ever we’d caution… caution if you’re planning on printing at large sizes.
- These are the world's best photo editors
Get the best Black Friday deals direct to your inbox, plus news, reviews, and more.
Sign up to be the first to know about unmissable Black Friday deals on top tech, plus get all your favorite TechRadar content.
Dave is a professional photographer whose work has appeared everywhere from National Geographic to the Guardian. Along the way he’s been commissioned to shoot zoo animals, luxury tech, the occasional car, countless headshots and the Northern Lights. As a videographer he’s filmed gorillas, talking heads, corporate events and the occasional penguin. He loves a good gadget but his favourite bit of kit (at the moment) is a Canon EOS T80 35mm film camera he picked up on eBay for £18.
