How to run Tails Linux from a USB Stick
Browse the web safely and anonymously with Tails

Introducing Tails Linux
Tails is a 'live' operating system, which you can boot from a USB stick or computer.
The OS routes all your network connections through the anonymizing network Tor, which makes it extremely difficult to trace your real location. By default Tails also loads into your machine's RAM memory meaning all traces of your internet history are lost a few minutes after you restart the machine.
- These are the best Linux training providers and online courses in 2017
Tails also supports a password protected 'persistent' mode which allows you to save files and application settings from one session to the next. The setup process is extremely simple, so why not take back your privacy today?

1. Prepare your installation
The Tails website lists several ways to install the OS onto a USB stick depending on what kind of computer you use.
The method used here is different but will work whether you're running Windows, Mac or Linux. You will need a USB stick at least 4GB in size as well as an ISO file of the latest version of Tails.
If you have a DVD-RW drive and know how to burn the ISO to a blank disk, do so and skip ahead to Step 6. Otherwise read on.
See our disk burning tips for more advice on creating a DVD or CD out of an ISO file.

2. Download VirtualBox
Oracle VirtualBox is a program that allows you to create 'virtual machines'. In simplest terms, this allows you to run an entire Operating System inside a window without affecting the rest of your system.
You can also run Tails inside a Virtual Machine, in order to install it onto a USB stick. Head to the VirtualBox website then download VirtualBox for your particular host - for example Windows users should click 'Windows Hosts'.
Open the file once downloaded to run the installer. In Microsoft Edge click 'Run' once the installer is downloaded to launch it.

3. Install VirtualBox and its extension pack
Once the installer launches, click 'Next', then 'Next' again to choose the default installation options.
Windows Users may see a warning before proceeding that your device may disconnect from the internet briefly while VirtualBox sets up new network interfaces. Click 'Yes' to proceed, the on 'Install' once again to finalise the installation. VirtualBox should launch automatically when the install is complete.
Return to the VirtualBox download page and click 'All Supported Platforms' by the words 'Extension Pack'. Double click to open the Extension Pack once downloaded. This will install support for USB devices in VirtualBox.
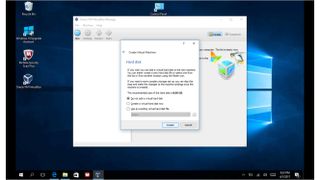
4. Create a Tails Virtual Machine
Click 'New' at the top left of the VirtualBox Window to create your Tails Virtual machine.
In the 'Name' field, type 'Tails Linux'. The other options will fill in automatically.
Click "Next" to proceed. VirtualBox will now ask you how much of your system's RAM memory to assign to the Virtual Machine.
Use the slider to assign at least 2GB of RAM but do not move it into the red area. Click 'Next', then 'Do Not Create a Hard Disk' in the 'Hard Disk' section. Finally click the 'Create' button. Your VM (Virtual Machine) will appear in the left hand pane in VirtualBox.
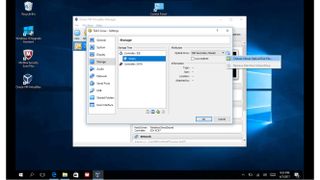
5. Configure the Virtual Machine
Click the ‘Settings’ button at the top of the VirtualBox window. Choose ‘Storage’ on the left hand side, then on the word ‘Empty’ in the storage tree menu. Click the CD icon to the right of the ‘Optical Drive’ drop-down menu and ‘Choose Virtual Optical Disk File’. Navigate to the Tails ISO you downloaded earlier.
Next click the ‘USB’ section in the left hand pane, then insert your USB stick. Click the small USB button with a green + sign on the right hand side and choose your USB stick. Click ‘OK’ to save your changes then on the ‘Start’ button at the top to launch your Tails virtual machine.
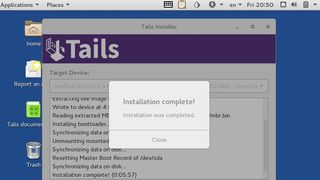
6. Install Tails
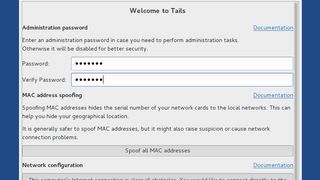
When Tails boots, choose ‘More Options’ then click the ‘Forward’ button. Tails will now ask you to set an administrator password for this session – remember that as Tails loads into RAM, by default anything you do inside it, including choosing a password, will be lost when you reboot. Enter the admin password twice then choose ‘Login’.
Once the Tails desktop loads, choose Applications > Tails > Tails Installer. Click ‘Install by cloning’. Make sure the correct USB device is selected in the drop-down menu and click ‘Install Tails’. Once installation is complete, click ‘Close’ then shut down VirtualBox.
7. Test your installation
Insert your USB stick into a computer, and fire it up. Depending on the machine you use, you may need to adjust your BIOS settings to boot from the external USB stick.
Choose ‘More Options’ and set an admin password once again. Take some time to explore the pre-installed apps. This is also an excellent time to read the Tails ‘Getting Started’ guide to learn how it protects you and the user documentation which gives more in depth information.
If you live in a country which blocks the anonymizing Tor network used by Tails, read the section on obfuscated bridges.
8. Create a persistent volume
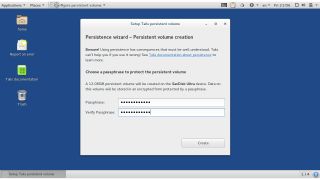
Tails allows you to retain information such as browser bookmarks and passwords in an encrypted partition on the USB stick. Read the Tails website's section on Persistence before proceeding.
Next, load Tails then click 'Applications > Tails > Configure Persistent Volume'. You'll need to set a strong password, then tick to store each type of data such as network settings or Tor browser bookmarks.
Click ‘Save’ and Tails will create the partition. Restart Tails to apply your changes. When you next load Tails, you'll see an option to ‘Use Persistence?’. Click ‘Yes’ and enter the password you chose earlier to access your data.
Nate Drake is a tech journalist specializing in cybersecurity and retro tech. He broke out from his cubicle at Apple 6 years ago and now spends his days sipping Earl Grey tea & writing elegant copy.
Most Popular

