
The recipe for the perfect food photo
The holiday season is in full swing, and on top of all the family time, blustery weather and gift giving, there's eating. Lots of eating.
Whether you're celebrating Thanksgiving, Christmas, Hanukkah or Festivus, the holidays bring out all the fixings. From decadent desserts to chunky casseroles and sumptuous stews. There's so much food to enjoy that it would be a shame not to take a picture to remember these festive feasts with. Here are a few food photography tips for creating mouth-watering pictures of food.
(Shot using an iPhone 6 and Fujifilm X-T1 with the XF 23mm f1.4 and XF 34mm f2.0 WR)

Elementary lighting
The most important thing in photography always comes down to lighting, and nothing looks great when it's drowned in darkness. The easiest way to make sure everything in the frame is well lit is to bring your plate to the window where natural light comes straight through.
Backlighting your subject works best, because it fills the background with a dream-like glow, all while emphasising depth, texture and dimension – characteristics that make food so appealing. This angle of light also highlights any streams of steam or smoke coming off of piping hot food.

Dial up your exposure
Of course, sunlight isn't going to work when it's dinner time and dark outside, or if you're dining out in a restaurant. In these cases, you'll have to dial up your exposure. Depending on the lighting conditions, you'll want to set your camera between ISO 400-1600, or even ISO 3200 if it's really dark.
You'll also likely have to choose a slower shutter speed or open up the aperture on the lens by picking a lower f-stop. It's not too hard to shoot completely manually, but you can easily get the perfect shot using semi-automatic modes, such as Aperture Priority and Program.
Get the white balance right
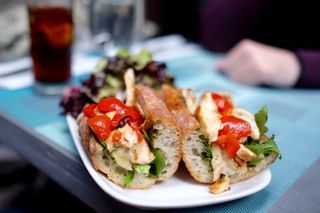
The biggest challenge of shooting indoors by far is getting the right white balance. Your food is going to look terribly unappetizing if it's too yellow or has a strange purple hue. Luckily, most digital cameras include settings for the most common types of light bulbs, including tungsten, incandescent and multiple variations of fluorescent.
If you have mixed lighting – such as a candle in addition to the dining room lights – things get a bit trickier, but most cameras also come with a way of manually setting the white balance. For example, Fujifilm, Nikon and Olympus cameras all have a one touch tool that automatically tunes the white balance based on a test shot. Sony cameras, meanwhile, have you moving around a dot on a color chart while previewing what your final shot will look like on-screen.
Work the angles
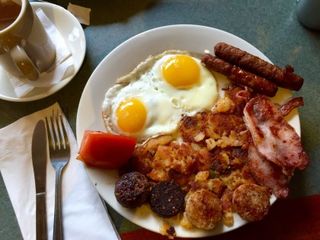
Now that we have the basics down, it's time to have some fun with angles. Shooting a plate of food is easy enough for anyone to point their camera and snap away, but always try to go for a different perspective.
Overhead shots are a great way of showing a full spread of food, especially if it's a tabletop with a whole bunch of differently colored dishes. Alternatively, if you're have a tall stack of pancakes or mile-high apple pie, why not emphasise the height by taking a portrait photo from the side of the plate. There are plenty of other angles, so play around and see what looks best.

Get in close
Getting closer to your subject is a basic rule of photography, and it makes complete sense when shooting images of food. This will not only give you a closer look at all the delicious details, but it also helps create a shallow depth of field. By adding more blurry bits into the frame, you can add layers of depth and color to your food shots, essentially allowing the viewers to "taste" the dish with their eyes.

Capture the process
If you want to tell a story with your food photos, shoot a few images of making the dishes, too. Capturing the process shows the transformation of raw ingredients into culinary art, and it's a fine way of presenting the story behind the final dish. It could be as simple as a cutting board of vegetables to a simmering sauce or meat browning on the grill.
Show the aftermath
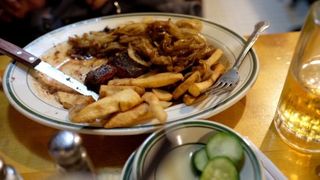
One of the basic tenets of food photography is that you can't take a bite before you take a picture, but this is really a rule that I say you should break often. The image of a perfect plate of food is so very rote at this point. Why not break from convention and capture a partially or half-eaten plate?
Taking a few bites makes the scene much more active and realistic. While untouched plates make for gorgeous still life photos, there's something warmer and more natural about seeing an image with scattered bones, smeared gravy or half-eaten bread on a plate.
- Here are the best iPhone camera apps

Kevin Lee was a former computing reporter at TechRadar. Kevin is now the SEO Updates Editor at IGN based in New York. He handles all of the best of tech buying guides while also dipping his hand in the entertainment and games evergreen content. Kevin has over eight years of experience in the tech and games publications with previous bylines at Polygon, PC World, and more. Outside of work, Kevin is major movie buff of cult and bad films. He also regularly plays flight & space sim and racing games. IRL he's a fan of archery, axe throwing, and board games.
Most Popular
