Master lens flair portraits
Lens flare is something we normally try hard to avoid in our images. Indeed, lens makers go to great pains to develop coatings that reduce the effects of flare, and lens hoods are designed to prevent flare-inducing stray light from striking the front element. But in this tutorial we're going to use lens flare to our advantage for a creative portrait.
Lens flare is caused by light bouncing around in the lens barrel as it is reflected off the various glass elements inside the lens. It is most commonly seen on bright days when the sun is in the shot, where it manifests itself as bright, colourful rings that radiate from the light source, or, if the sun is just out of the frame it can make the entire shot look hazy, flooding the image with a soft, bright light that reduces contrast and leaves the shot looking washed out. This is due to light leaking in from the sides of the frame.
Although lens flare is usually considered undesirable, it can be used to enhance images with creative effects, either in an abstract and overpowering style for some unusual shots, or subtly to add a faint, soft, romantic glow to your portraits, ideal for spring and summer shoots.
To balance exposures when using such strong backlighting, try using a reflector to fill in some of the shadows and brighten up your subject, thus enabling you to capture an exposure that darkens brighter skies and keeps the cloud textures from blowing out.

1. Low light
Shoot late in the afternoon on a sunny day so you can place the sun low in the sky behind your model. If you shoot too early in the day, you will have to frame your model at an extreme – and unflattering – angle.

2. Find the angle
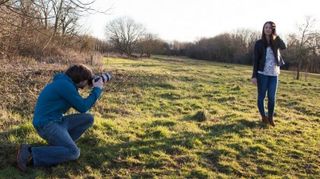
Position your model to the west, so that you're shooting directly into the sun, and at an angle where the sun is partially blocked by their head, so its light wraps around them, creating a rim light effect.

3. Frame the sun
Having the sun clear in the sky will blow out the highlights and flood onto your model, obscuring their face. Block the sun from view and then move slightly to let it creep around your subject for a subtle flare.

4. Difficult Focusing
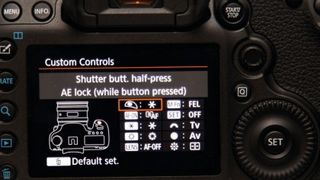
Shooting into light can cause autofocus problems. Set back-button focusing, so the shutter button only fires the camera; now you can focus as your model blocks the sun, then shoot the flare without refocusing.

5. Aperture Priority
Set your camera to Av mode to control the depth of field and set a wide aperture to blur the background; we've used f/2.8.
This softens the light and lens flare for a more pleasing light around a shallow focal point.

6. Exposure compensation
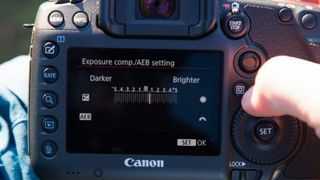
To keep your model from underexposing against the bright sky, dial in positive exposure compensation to lighten shadows. Start off with 1/3 stop, and increase it until there's a good level of detail in your subject.
Most Popular

