
Shoot and edit a self-portrait
The 'selfie' has become a worldwide phenomenon in the past couple of years thanks to the ubiquity of camera phones and social media – and everyone's getting in on the act, from pop stars to presidents.
Just take a shot with a forward-facing camera that automatically focuses from arm's length, add a couple of garish-looking filters, and you've got yourself a fun instant photo that you can share with friends and family!
But selfies can be much more than shaky snaps taken with your smartphone – they can be carefully composed and professional-looking self-portraits taken with your DSLR.
Stylish selfies
Since the earliest days of photography, self-portraits have been considered serious pieces of work, and a way for photographers to improve their skills and experiment with creative techniques, and this project we'll show you how you can compose, shoot and edit your own stylish selfie.
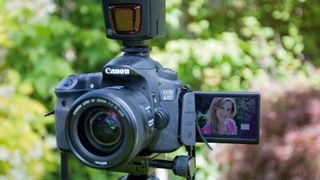
Shooting a selfie with your DSLR is an excellent way to hone your outdoor flash skills. All you need is your camera, a kit lens, a flashgun and a tripod. Because you'll be in front of the camera, a remote shutter release – ideally a wireless one – will make focusing and shooting a great deal easier; if you don't have a remote, you can use the 10-sec self-timer mode on your camera.
Once you've got your portrait, we'll show you how to edit it in Elements, shifting the colours and adding a vignette to recreate the look of popular Instagram-style filters.
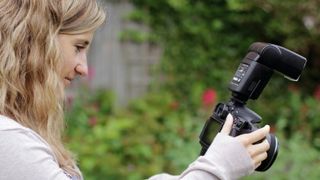
Set up your camera
Choose an outdoor location such as a park or garden that provides a colourful backdrop. Position a chair in front of the backdrop with the sun behind, so it acts as a backlight.
Place your camera on a tripod at a height slightly higher than your eye level when you're sitting in the chair, and tilt the camera down: this is a more flattering angle for portraits.
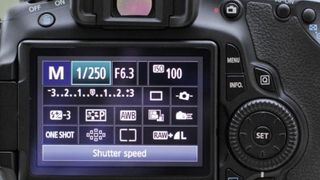
Camera settings
Set your camera to Manual mode for full control over the aperture and shutter speed, and set your shutter speed to the maximum flash sync speed; this is usually 1/200 sec or 1/250 sec.
Set a mid-range aperture of around f/8, and take a test shot to expose for the background – if it looks a bit dark set a wider aperture. Keep your ISO at 100 for top-quality shots.
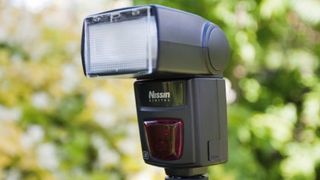
Fill flash
It may seem odd to use flash on a bright sunny day, but it isn't used to illuminate the whole scene – it simply reduces the contrast in your face by filling in shadows for a flawless finish without overexposing the bright background, and it also creates nice catch lights in the eyes.
The sunlight behind acts as a rim light, lifting the subject out of their background and adding an attractive glow to the edges of their hair and body.
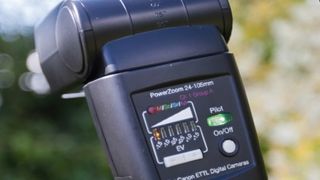
Flash settings
Attach your flashgun to the hot shoe of your camera, set it to Manual mode if that option is available, and dial in the lowest flash power; you can then fire off some test shots, and increase the flash power if required.
Our flashgun has a diffuser built in, so we can reduce the harshness of the flash to create a softer and more flattering look.
Composition
Switch to Live View mode, and work out a rough composition based on where your head and shoulders will be when you're sitting down.
Ideally you want to be positioned slightly to the left or right of the frame, and angle your head and shoulders so you're looking into the frame.
Having a friend step in for you will make things easier; alternatively you can take a few test shots and adjust the composition as required.
Shoot hands-free
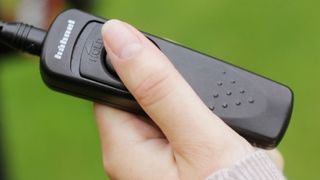
The easiest way to shoot a self-portrait is with a remote shutter release: half-press the button to pre-focus, and then fully press it to take a shot.
You can also use the 10-sec self-timer mode on your DSLR, but if you do this you'll need to focus manually on where you'll be sitting – again, use a stand-in, or a bag or other object.
Cloning and colour
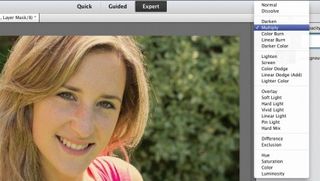
Click Open to open the image in Elements. Take the Clone Stamp tool, and clone out the edges of the chair, Alt-clicking to sample background detail. Add a Solid Colour fill layer via the Adjustment Layer menu.
In the Colour Picker, enter #f4e0bd in the hex field and click OK. Change this layer's blending mode to Multiply.

Adjust colour and contrast
Add a Levels adjustment layer. Select Red from the Channel menu, and set the shadows Output Levels slider (the lower-left slider) to 30 to add a red tint to the shadows.
Next select the Green channel and set the same slider to 10 to add green, then select the Blue channel and set the slider to 60 to add blue. Select the RGB channel and set Shadows to 25, Midtones to 1.18 and Highlights to 245.
Add a Brightness/Contrast layer, and set Brightness to 33 and Contrast to 48.
Blur the background
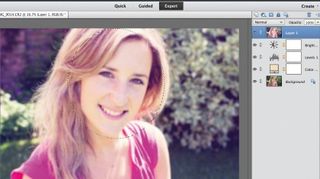
Press Ctrl+Alt+Shift+E to create a merged layer. Go to Filter > Blur > Gaussian Blur and set Radius to 12 pixels.
Take the Elliptical Marquee tool, hold down Shift and Alt, and draw a circle out over the face. With the selection active, Alt-click the Layer Mask button to mask the blur from the face, then blend in the edges of the mask with a soft black brush.
Add a new layer and rename it 'vignette'. Select the Elliptical Marquee tool.
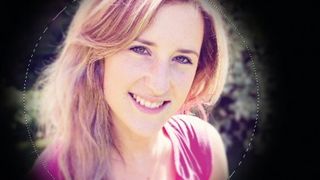
Add a vignette
Click and drag to draw an ellipse that fills the frame. Go to Select > Inverse, then go to Select > Feather and set Radius to 200 pixels.
Go to Edit > Fill Selection, choose Black and click OK. Press Ctrl+D to deselect, the set the layer's blending mode to Overlay and reduce its opacity to 40%.
